How to lay tiles
ReadyPlanet.com
dot
dot
Search For Tiles

dot
dot
Swimming Pool Tiles
dot
bulletBlezz pool tiles
bulletTGs Swimming Pool Tiles
bulletGP Swimming Pool Tiles
bulletKera Pool Tiles
bulletBlezz Colorful Tiles
bulletPool Tile Coping
dot
Antique Tiles
dot
bulletCement Tiles 8"x8"
bulletBlezz Antique Tiles
bulletBlezz Showroom
bulletGranito Antique Tiles
bulletBlezz Ancient Tiles
bulletEncaustic Cement Tiles
bulletPaint & Drop Tiles
dot
Wood Tiles
dot
bulletBlezz Wood Tiles
dot
Landscape Tiles
dot
bulletKenzai Tiles
dot
Tile Exhibition
dot
bulletMaldives Exhibition 2016
bulletArchitect 2015
bulletCovering 2015
bulletCanton Fair 2014
bulletCambuild 2014
bulletARCHITECT14
bulletBuild4Asia (HKCEC)
bulletLaos Exhibition 2012
dot
Blezz Gallery
dot
bulletBlezz Gallery
bulletCraftstone
dot
Tile Size
dot
bullet4"×4" Pool Tiles
dot
Blezz Pool Tile Projects
dot
bulletTG - Crystal Blue KN bangkruai
bulletSummer Garden Pool
bulletOZO Srilanka Pool
bulletCrystal Blue Tiles
bulletRose House
bulletOpal Tiles
bulletThe Grand praram2
bulletNatural Hill Huahin
bulletViphawadi 20
bulletSwimming pool in Bangkok
bulletTira Tiraa Hua Hin
bulletThai style building
bulletSimilan Rife
bulletThe bangkok
bullet Swimming Pool Luxury
bulletmanthana village
bulletChan Isara City
bulletCircle Swimming Pool
bulletSwimming Dolphins
bulletCondo Bell Park Rama 3
bulletNantawan village Srinakarin
bullet Grand Diamond Pratunam
bulletHotel All Season
bulletBansuanthon
bulletschool krittasilphwittaya
bulletNatural Hill Hua Hin
bullet Thonglor
bulletSupalai lagoon
bulletPhuket Graceland
bulletJW Marriott Hotel
bulletCourtyard Marriott
dot
Antique Tile Projects
dot
bulletKhlong San Plaza
bulletBha Wa Spa
bulletSit-In lido Siam
bulletS&P Suvarnabhumi
bullethome customers at rayong
bulletDessert Shop
bullethome customers at prachachuen
bulletCentral Bangna
bulletHome Customer Prachin Buri
bulletHome customers Chiang rai
bulletHome Customer Chiang Mai
bulletSteamed Dumpling Shop
bulletRestaurant Central Eastville
bulletThe Street Ratchadaphisek
bulletMing Shou Boutique House
bulletBang Saphan Prachuap Khiri Khan
bulletCustomers buy
bulletTUMRHAP PHUKET
bulletAmphawa Na Non Hotel & Spa
bulletSupalai lagoon
bulletHouse Don La Ya Sukhumvit 49
dot
Tile Adhesives
dot
bulletHow to choose Tile adhesives
dot
Tile Grout
dot
bulletPool Tile Grout Color
bulletEpoxy tile adhesive and grout
dot
How to Lay Tiles
dot
bulletLay Pool Tiles
bulletJapan Tiles
dot
Tile Catalog
dot
bulletAntique Tile Catalog
dot
Blezz Decor
dot
bulletUse space under stairs
dot
dot
bulletPool tile company
bulletContact Blezz Tile
bulletHow to Calculate Floor area For Tiles
bulletBlezz Tile Test Report
bulletTG - Crystal Blue KN bangkruai
dot
Tile Patterns
dot
bulletPTT Tile Patterns
bulletFantasy Tile Patterns
bulletTile Patterns Flooring
dot
Blezz Antique tiles for Toilet
dot
bulletBlezz Antique tiles for Toilet
bulletNearby Hua Lamphong
dot
Blezz Cement antique tile for Garage
dot
bulletantique tile for Garage
dot
Maldives Tile
dot
bulletSwimming Maldives
dot
Other
dot
bulletBlezz donate antique tiles for Kasetsart University


 How to lay tiles


How to tile a bathroom wall
วันที่ 22/03/2015  08:32:40 AM ,ผู้เข้าชม : 1995

How to tile a bathroom wall

Tiles are undoubtedly amongst the popular choice for bathrooms. Everyone knows that the tiles are the best way to install on the walls and floor the bathrooms. It is wiser to use ceramic tiles for bathroom installation, as these ceramic tiles are highly durable, non-flammable, hygienic and requires low maintenance. The uses of ceramic tiles are from ancient time and the technology is still evolving this tiles with more creativity. For bathrooms you need waterproof surface which should be slip resistant and protective surface. The advantage of tiles is endless. It is not only highly durable but the versatile designs allow you to decorate you bathroom exactly like the way you want. The slip proof nature of ceramic tiles makes it safe for your bathroom areas and also reduces the chance to accidentally get slip. But yes you have to try to keep your bathroom dry for the best safety measurement. To decorate your bathroom you can also mix and match your ceramic tile and use different shapes and sizes, you can add borders and make your own custom design to make it look unique and stunning.

antique tile

The tile on your bathroom increases the interior of your bathroom further and also protects the wall of your bathroom from getting damp due to daily water usage. Installing the wall with tile can save your money from repairing the wall after every 6months due to dampness, proper planning and accurate installation of wall tile can result in economic when you will be able to enjoy I for long run. Good installation does not only enhance the beauty but also gives the longest lasting warranty. To get the best result you have to keep few things in mind. Start with good inspection of your bathroom properly, measure the whole area and choose tiles that will best suit your bathroom. You can use ceramic tile that comes into two forms, one is glazed and the other is non-glazed tiles for your walls. When you buy you tiles make sure you buy some extra tile, incase if you need some extra while installation.

Material that you need to install tile on your wall:

·         Level

·         Tile cutter

·         Sponge

·         Grout powder

·         Adhesive

·         Tape for measurement

·         Notched trowel

·         Tile spacer

·         Grout sealer

·         Carpenter’s Square

·         Clean rags

·         Goggles

·         Pencil

·         Hammer

·         Spackling compound

·         Silicone caulk

·         And most importantly the tiles


Ceramic bathroom tiles are either porous tiles or non-porous tiles. As it is very common nature of bathroom to be always wet damped, water may get clogged and can be easily dirty. So it is ideal to use non-porous ceramic tile for bathroom which is waterproof in nature and easy to clean.

antique tile

Now let’s start the process, you need to use tiles adhesive to stick the tiles to the surface. The installation surface must be very clean and dry for best installation. In a shower or other high-wet location, use cement-fiber board as the tile substrate. For a new dry wall there is no need to tape the joints. Just seal the wall with a thin coat of adhesive. To prepare existing wall strip off the coverings like wall paper or loose paint. Patch any holes or crack that are on the wall, and sand smooth them when they are dry. When installing tile in a bathroom wall, leave a 1/8-inch gap along the area where the wall meets the top of a tub or shower base. This area will be caulked later with silicon caulk. Caulk permits movement — settling, expansion and contraction — without cracking.

Choose a pattern to lay your tile, there are two types of pattern:

  • A jack-on-jack pattern is the most common. The pattern consists of tile laid like squares on a checkerboard.
  • A running bond pattern has offset grout lines for each row.


 Now, use level and measuring tape to measure the area and mark for the middle lines in the area you are going to tile. Use the pencil to mark the location. After the measurement cut your tiles according to the shape you need using you tile cutter machine. Mix the adhesive properly and nail the horizontal furring strip to the wall at your chosen starting point. Use a level to keep it straight, and use a wire detector to check for wires before hammering the nails. Make sure you will be able to remove the furring strip easily.

Apply the adhesive with a notched trowel on the wall, pushing it into the right angle, spread the adhesive by pulling the notched trowel several times if necessary, to make sure it is even. This improves the adhesion of each tile to the floor. Start placing tile, press firmly to fix it properly.


After you are done with installation of tiles, mix grout and apply grout. Now wait for everything to dry, and clean the whole area after few hours. Let the whole area dry for another 48 hours once everything is done.

How to install landscape tile
วันที่ 07/03/2015  16:06:05 PM ,ผู้เข้าชม : 2306

How to install landscape tile (rewrite to unique content)

Most of the home owners use tile on their home to increase the interior beauty of their home. A good quality tile plays a vital role in giving you the peace of mind for years after.  But it is not only the quality of the tile that matters but also the way of installing them on your place is another important issue. The landscape tiles are for installation on walls. These tile are highly durable and resistant to water. Still it is preferred that you install them for dry areas and avoid wet areas like kitchen and bathroom. The installation process of landscape tiles is easy and you can install all by yourself following this guide.

antique tile

Installation procedures of Fan pattern (loose)

The process of beginning with every tile installation is same; first you need to clean the area properly where you want to install the tiles. Clean the sub floor from any foreign material and make the surface flat. If the surface is not flat you need to do plastering to make the surface flat, let the surface dry completely before you proceed. Draw a straight line XY from the midpoint and similar lines making gap of 90 cm from each side.  Now it is time to draw a horizontal line and name them UV from that same midpoint and create similar line of gap of 45cm from both upper side and lower side of the measurement.  

Now draw a radius of 90cm above the previously measured lines. Start the circle from the point where XY and UV crossed each other. Draw this same pattern of circle on the whole areas where you want to install the tile. Use any sticking tool and use a hard nail with a starting point of 35” towards and proceed with the lines you have created.  Keep the landscaped tiles drowned in water. Mix the adhesive cement with water properly and let the mixture settle for 5minutes to let the mixture gets chemically combined completely. Now start with the outermost side of you planned floor and gradually move to the center. Make sure you have adjusted the tiles properly and installed them well while you complete the pattern. Now cleaning the excessive adhesive from the surface of the tile and clean the whole area of the tile with a wet sponge. Let them dry and install properly before you start grout line on them. And now it is all set and your home is glowing more than ever before.

Installation procedures of Circle Pattern

First calculate the diameter of you radius. Draw a straight line XY and a horizontal line UV from the midpoint of the area. And then start the circle with that radius from the midpoint of your area. Draw your radius at the point where XY and UV intersected.  Now mix the adhesive cement with water and start installing the tile from the midpoint of the circle that you have drawn. And install them as you have drawn and let them dry for 24 hours. Clean the surface of the tile using a wet sponge and grout the lines when they are completely dry.

Installation methods for a wall corner

This is an important part while you install tile on your wall. You can do this with any of these methods. First you can use a Vcap tile which has a joint of 1cm. secondly you can use 2’X8” tile to install and adjust them properly at the joint of the corner. Third method is you can cut one side of the tile at 45 degrees and out the separated tile together to fit in the corner of the wall.

10 Tips to Lay Tiles
วันที่ 20/12/2014  00:13:41 AM ,ผู้เข้าชม : 1966

10 Tips to Lay Tiles

antique tile

Laying the tiles is a hard job to be performed but it can be made easy by just following some important tips. These tips are helpful and avoid any serious damage to the job.  Tips are the advices from senior working people who have a lot of experience in this field. Installation of tiles should be done properly otherwise the tiles will come off the floor after sometime. The following are the helpful tips which will ensure the safety of working people and the tiles, after their installation.

·        Floor should have the minimum thickness of 1 1/8 inches.

If the floor has thickness less than 1 1/8 inches, then the floor will not bear the weight of the tiles and people walking on it. It will result in the damage of tiles. This will also damage the grout and create a lot of problems.  It is therefore advised to install a cement backer board. It will reduce the chances of cracked tiles.

·        Make sure that the layout is even from side to side before placing tile with mortar.

It is advised to ensure that the layout is even from side to side in both directions before setting the tile in place. It is important that you never have less than the half of tile’s width remaining from the wall.

·        Keeping loose tiles aside.

Tiles when picked from the box van vary. So when the tiles are placed on the floor make sure the tiles are not loose and there is enough space between them for grout. Picking and keeping loose tiles away will help to adjust the tiles as needed.

·        Using appropriate trowel for thin-set mortar.

Trowels are of different types having different-sized notches, so consult it with the store associate to see whether the selected trowel is suitable or not. Use the trowel to spread the thin-set mortar carefully along the layout lines of the tiles. Always work in the small square sections, because the mortar may harden before you even put the tiles in place. Do not to cover layout lines or step on it.

·        Tapping gently with a rubber mallet.

Always start the process of laying tiles from the center of floor and tap tiles gently after placing them on the floor with mortar. Use plastic or other spacers after placing each tile to ensure equal gap between the other tiles for proper grout.

·        Cover the mortared area thoroughly.

Always place thin set mortar in small square areas to avoid hardening of mortar. When the thin-set mortar is placed on small square area of the floor; place tiles over thin-set mortar thoroughly.  Do not place tiles on hardened mortar as it will not hold the tile. Mortar should be made thin enough so it may not harden way before the placement of tile over it.

·        Keep working in the square areas to avoid hardened mortar.

Follow the process to create small square areas for the placement of tiles. Move forward to other square section when the previous section is covered. Complete setting tiles by working in the square areas, and completing them one by one.

·        Place tiles along the wall in the last phase.

Since the space available along the wall won’t be the same as the size of tile. So it requires cutting the tiles in proper size.  So first place a tile against the wall and also place a plastic spacer, for grout. Now place a new tile directly over the last tile. You will get the size of the tile needed. Mark the loose tile and cut it with the cutter according to the size of the tile needed. Keep in mind that the size of tile is kept as the space of mortar is left along the wall. To make a straight cut using a tile cutter, place the tile in cutter facing up, adjust the length according to the dimension of tile required. And then cut the tile by moving wheel of cutter through the tile.

·        Selection of the rubber grout float.

Grout float should preferably be of rubber/plastic as it will help to spread the grout and fill the space between tiles properly. Press the grout in the gaps using the sweeping motion. Grout will fill the gaps.

·        Do not make haste when using grout sponge.

Grout sponge can be used to remove extra grout, leaking out of the gaps between tiles. So do not make haste and let the grout mixture dry and remove the haze using grout sponge. Grout sponge should be used with care so that it may not damage the grout between gaps of tiles.

How to Cleaning tiles with right tools
วันที่ 20/12/2014  00:12:02 AM ,ผู้เข้าชม : 2245

How to Cleaning tiles with right tools

 clean tile

Keeping the tiles clean, after their installation, is a hard job. But using proper tools can make this job easy and save a lot of time/money.

1 Non-abrasive cleaner:

This all-purpose cleaner will help to clean any smudge of food or detergent from the tiles. Food leaves a mark which is hard to remove once it drops on the floor tiles. So always buy a good quality non-abrasive cleaner to clean the tiles properly, without losing the glaze of tiles.

2 Paste of Baking soda and Water:

Grout is porous and can absorb grease and other stains easily. You can’t use the cleaner for it and instead make a paste of baking soda and water. Let the paste stay for overnight on the stain of grout, and remove the paste using a nylon brush. Repeat pasting the grout again and again to remove stain completely. Use the sealer for grout, to avoid such any future accidents.

3 Absorbent clothes:

For spills, you should keep absorbent cloths. It’s important to remember that plain water and tracked in dirt are also 'spills'. Clean the spill as early as possible to avoid damage to tiles of the floor. Some of the cold drinks damage the floor tiles because of their acidic nature. Absorbent clothes help to clean them so they do not harm the glazed tiles.

4 Damp mopping:

Damp moping is the most effective cleaning method. It is cost effective and cheap. And it does not harm the tiles. But this method will require daily routine mopping of the floor. The trick to effective damp mopping is that you need to keep up on cleaning the floor.

5 Ammonia:

The accumulation of wax on floor makes the floor tiles look yellow over time. Remove layers of old wax and refresh your floor washing with a mixture of 1 cup ammonia in half gallon (2 liters) of water. Let the solution sit for three to five minutes, then scrub it with a nylon or plastic brush to remove old wax from tiles.

6 WD-40:

Sometimes the marks of buckets are left on the tiles after a long period of time. So spray some WD-40 onto a soft cloth and wipe up the floor with it. Rust marks on the tiles left by the rusty appliances can also be removed using WD-40. WD-40 is easily available on any good store.

7 Vinegar and water solution:

If soap or water spots have reduced the shine of ceramic tiles, you can bring the shine back by rubbing the tiles with half a cup of white vinegar, 1/2 cup ammonia and 1/4 cup borax mixed with 1 gallon (3.7 liters) of warm water. Rinse the tiles with cold water and dry them.

8 Steel wool:

The black marks of rubber soles left behind do not come off with a mop, no matter how many times you try mopping it. To get rid of these stains, you should gently rub the surface with a damp steel wool, usually used with soap. When the mark of the rubber sole is gone, wipe the floor clean with a damp sponge. These stains will come off easily using a steel wool rather than mopping the tiles again and again.

9 Pencil Erasers:

Pencil erasers can remove the heel marks easily from the tiles. Rub the marks gently using a good quality eraser. These marks will come off then. But this process is easy if the marks are small. For the big and lengthy marks, other methods stated above are easy to apply. Erasing method is cumbersome because it requires great strength and time to remove the mark.

10 lemon juice and borax:

Lemon juice is acidic in nature and is being used for cleaning purposes for ancient times. Clean rust stains from ceramic tiles by applying a paste of equal parts lemon juice and borax to the affected area of the tiles and allow it to dry then clean tiles by a damp cloth.

Another procedure involves using lemon juice on the rust stain for about five to ten minutes and then scrubbing with a nylon brush or old toothbrush to clean it. The more effective method is to sprinkle some salt on the lemon juice and then rub the stain off from tiles.

11 Spray and vacuum cleaning method:

This method uses a high pressure washer/sprayer, Vacuum pump for removing cleanser from the tiles, Vacuum tank for keeping the removed cleanser. This method uses the spraying technique with which the cleanser is sprayed on the tiles by sprayer, and then cleanser is allowed to settle down on tiles. Now the cleanser solution is removed using the vacuum pump by moving in rows and columns across the tiles of floor.

How to Install Ceramic Floor Tiles
วันที่ 20/12/2014  00:09:16 AM ,ผู้เข้าชม : 2088

How to Install Ceramic Floor Tiles
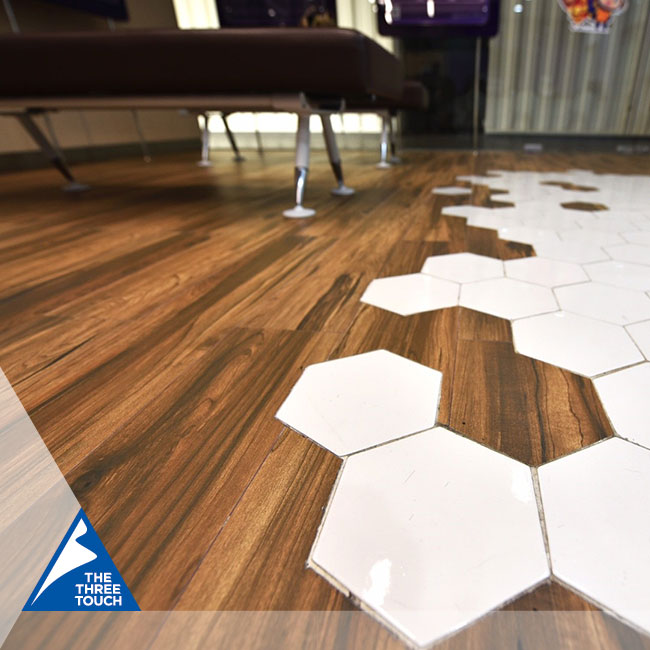
 wood tile

The first and most important thing is to create the plan to place the tiles on your floor; if you don’t do this there is a high possibility that your room floor will have different shapes of tiles. So you must complete the floor plan by drawing the room walls on the grid paper sheet or any other sheet if the grid paper is not available. Be vigilant about the placement of doors, cabinets and other things in the room which will disturb the overall process of laying tiles properly. Keep this in mind that the floor should be good enough to support tiles, mortar, grout and other home appliances when the job is finished.

Tools needed:

  • ·        Tape measure
  • Framing square
  • ·        Chalk line
  • ·        Grid (graph) paper
  • ·        Safety glasses
  • ·        Rubber gloves
  • ·        Buckets      
  • ·        Drill and mixing paddle
  • ·        Spray bottle
  • ·        Tile trowel
  • ·        Rubber mallet
  • ·        Sponges
  • ·        Abrasive stone
  • ·        Manual tile cutter
  • ·        Wet tile saw
  • ·        Tile nipper
  • ·        Grout float
  • ·        Cheesecloth

Materials needed:

  • ·        Tile
  • ·        Tile spacers
  • ·        Water
  • ·        Thin-set mortar
  • ·        Grout
  • ·        Film remover
  • ·        Grout sealer
  • ·        Stain Blocker for grout
  • ·        Paper towels for cleaning


Procedure for Installing Ceramic Floor tiles:


1. Floor Plan for Tile layout

You must make sure that the floor, on which you are laying tiles, is appropriate for tile installation. Otherwise the whole purpose of tile installation will come apart.

To make the floor plan layout, first find the center of floor of the room. To do this, measure the four walls in the room and find their midpoints, and then snap two chalk lines in which one is from the midpoints of two opposite walls and another from the midpoints of the other two walls. They both will then intersect to give the center point of the floor.

2. Check your floor layout

For this step, lay down the single row of the tiles without mortar, starting from the center point of the floor and going in outward direction in both the sides of center point. Do not pull the tiles from a same box. Pull the tiles out of the different boxes and mix them so that the differences in the tiles won’t be noticeable. Be aware that the some tiles have direction in the form of arrows on the backside of tiles. When

Follow the instructions available on the package of cement/bonding agent to prepare your thin-set mortar.  Use your bucket and mixing paddles. Clean the paddles properly to avoid hardening of mortar on it. Let you lay down the tiles the arrows should be pointing in the same direction so that the pattern is properly aligned and it does not look bad.

3. Ensure Safety measurements

You should be wearing proper rubber gloves and safety glasses when you apply mortar. If possible, arrange some knee pads like those used in skating. These knee pads will save your knees from dirt and mortar. They also help to evenly distribute the weight of the body.

4. Mix your Thin-set mortar

the mortar stand for 5-10 minutes after mixing, do not use it immediately. It is called Slake Time. It allows the mixture components to be fully activated.

Always mix up a bucket of thin-set mortar applicable for the type of tile being used. Discuss it with the store owner to ensure that you buy the right mortar for the tiles you have chosen.

5. Applying thin-set mortar

Use the trowel to take out mortar needed for the tile. Start from one quadrant of the center point you marked. Spread the mortar using flat side of the trowel on the backer board; now press it on the backer board at estimated 45 degrees angle.

6. Laying the tiles

At first only apply the mortar for one or two tiles at one time. Now follow the chalk lines as in the grid paper, placing tiles in a straight line.

7. Keep tiles leveled and clean

After placing the tiles, slightly tap the tile using rubber mallet. It will level the tile and spread the mortar evenly. Use the sponge to clean the extra mortar that ends on the top of tiles. If it dries, then it is hard to remove it from the tiles.

8. Finish laying the tiles

Follow the above steps properly and you will finish the first quadrant of tiles. Keep doing the same for the remaining three quadrants of the floor to completely cover the floor. Now the space around the walls will require cutting the tiles.

 9. Measuring and cutting the Tiles

Measure the space left carefully and cut the tiles accordingly.

10. Mix Grout

Ask the store associate to buy the right grout for your tiles. Follow the instructions on the package carefully to prepare grout mixture.  Allow it to settle down for 5-10 minutes.

11. Spreading grout mixture

Now start spreading the grout on the tiles using grout float. Spread it using the same procedure followed for mortar.

12. Cleaning excess grout

Use the sponge to clean excess grout from the tiles.

13. Sealing the grout

Grout sealer gives invisible protection to the grout. Sealing helps to keep grout look new and clean. If the tile is not glazed tile, then be careful to only seal the grout not the tile.

หน้า 1/4
1 2 3 4  [ถัดไป]
[Go to top]


Copyright Blezztile © 2014 All Rights Reserved.

 
Blezz tiles

The Three Touch Asia Pacific Co.,Ltd.

56/23 Seri Thai Rd., Kannayao, Kannayao, Bangkok 10230 Thailand

Tel. +662-3799065-67 Fax.+662-3799070 

Email:  cherrythe3touch@gmail.com  , treetouch@gmail.com